

Most of the Andriod users know about file sharing tools which lets the users to share the data directly with other user like, share it the most popular one. This is very much useful when there is no A.P to relay the traffic from one user to other. The below diagram shows typical scenario where the Access point connects multiple devices. In WiFI terms this is called infrastructure mode and A.P is the master who controls the whole basic service set.
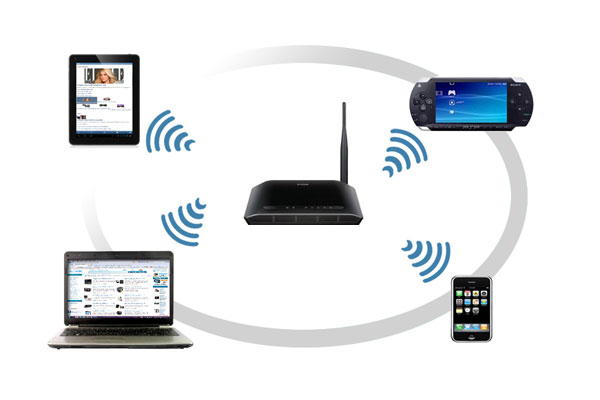
Diagram 1. Access point controlling other devices.
This blog describes the method to connect two different linux machines directly through WIFI. this makes interconnecting machines easily without the hastle of connecting any wires.

Diagram 2. Wifi Direct devices connecting directly with each other.
Requirements to do direct file transfer between linux machines:
Wireless NIC should support the following modes in order to do P2P communication:
* P2P-client (Client)
* P2P-GO (Group owner)
* P2P-device
This can be found out by using the “iw phy” command. Check for supported interface modes in the output when you run the iw phy command. Most of the modern WirelessNICs support this feature. The WirelessNIC on my linux machine is based on intel 3160 chipset. This NIC is based on 802.11AC (wave1) standard and supports the needed P2P modes.
The other device which i am going to use is beaglebone black development platform from TI. This board is based on ARM processor and it has rich peripheral support.
Pls google to find out more.
Unfortunately, this board doesn’t have an inbuilt Wifi support. But the good thing is it has an USB port which lets us to connect any WIFI card of our choice and in our case the one that has support for P2P.
For this blog I have chosen an USB adaptor Tl-WN722N from TP Link. This USB adaptor is based on Atheros chipset which has support for P2P.
Software requirements:
Wpa supplicant is the software which helps us to establish P2P. Other than wpa supplicant there are no specific software requirements to do P2P. I used linux mint 18 with stock wpa supplicant on an X86_64 machine. You can also compile wpa supplicant if have want to use the latest and greatest release.
Pls look into the below link for compiling wpa supplicant for X86_64 machines.
Compile wpa supplicant for x86/x86_64 with p2p support
Almost the same setup holds good for the BBB development platform also. My BBB runs Arch linux with precompiled wpa supplicant. Here too u can plan to use the latest release of wpa supplicant. But to do this you need to cross compile wpa supplicant for ARM clones.
P2P-Go is running on a X86_64 machine with linux mint 18 distro and P2P-Client is BBB running on a ARM processor.

Diagram 3. P2P-Go Machine running linux mint 18 on X86_64.

Diagram 4. Beaglebone black with USB WiFi adapter connected to laptop.
At this stage, make sure wpa supplicant is available on your GO machine as well as on your client machine. Next is to create a new config file which we need to use on GO to establish the connection.
Below is the example of the conf file which I used. This is a simple conf file but it can be made complex depending upon your requirement.
ctrl_interface=/var/run/wpa_supplicant
update_config=1
device_name=mint
device_type=2-0050F204-1
p2p_listen_reg_class=81
p2p_listen_channel=1
p2p_oper_reg_class=81
p2p_oper_channel=1
p2p_go_intent=1
p2p_no_group_iface=1
On the GO machine run the below command:
wpa_supplicant -i wlp6s0 -c test.conf -Dnl80211
If you get error while executing the above command, try to remove the already existing entry in /var/run/wpa_supplicant/. And also make sure you are pointing to the correct location of the conf file.
Few points to mention:
- If network manager is controlling your device then try to stop it.
- If any instance of wpa supplicant is running then try to kill that also by using the killall command.
This makes sure no other process is controlling your interface other than us manually.
After making sure network manager and wpa supplicant is not running, with the mentioned setup and command we have started the wpa supplicant with the proper config file.
Vostro ~ # wpa_supplicant -i wlp6s0 -c test.conf -Dnl80211 &
[1] 13913
Vostro ~ # Successfully initialized wpa_supplicant
Could not read interface p2p-dev-wlp6s0 flags: No such device
Now open up another terminal and run wpa_cli command as below:
Vostro ~ # wpa_cli -i wlp6s0
wpa_cli v2.4
Copyright (c) 2004-2015, Jouni Malinen <j@w1.fi> and contributors
This software may be distributed under the terms of the BSD license.
See README for more details.
Interactive mode
>
>
>
> p2p_find 10
OK
> P2P-DEVICE-FOUND 64:70:02:28:c1:bc p2p_dev_addr=64:70:02:28:c1:bc pri_dev_type=2-0050F204-1 name=’bbb’ config_methods=0x1108 dev_capab=0x25 group_capab=0x0 new=1
P2P-FIND-STOPPED
> p2p_peers
64:70:02:28:c1:bc
> p2p_connect 64:70:02:28:c1:bc pin intent 15
62349055
> P2P-GO-NEG-SUCCESS role=client freq=2412 ht40=0 peer_dev=64:70:02:28:c1:bc peer_iface=64:70:02:28:c1:bc wps_method=Display
CTRL-EVENT-SCAN-RESULTS
CTRL-EVENT-SCAN-RESULTS
> p2p-wlp6s0-0: SME: Trying to authenticate with 64:70:02:28:c1:bc (SSID=’DIRECT-VN’ freq=2412 MHz)
p2p-wlp6s0-0: Trying to associate with 64:70:02:28:c1:bc (SSID=’DIRECT-VN’ freq=2412 MHz)
p2p-wlp6s0-0: Associated with 64:70:02:28:c1:bc
p2p-wlp6s0-0: CTRL-EVENT-EAP-STARTED EAP authentication started
p2p-wlp6s0-0: CTRL-EVENT-EAP-PROPOSED-METHOD vendor=14122 method=1
p2p-wlp6s0-0: CTRL-EVENT-EAP-METHOD EAP vendor 14122 method 1 (WSC) selected
p2p-wlp6s0-0: WPS-CRED-RECEIVED
p2p-wlp6s0-0: WPS-SUCCESS
P2P-GROUP-FORMATION-SUCCESS
p2p-wlp6s0-0: CTRL-EVENT-EAP-FAILURE EAP authentication failed
p2p-wlp6s0-0: CTRL-EVENT-DISCONNECTED bssid=64:70:02:28:c1:bc reason=3 locally_generated=1
p2p-wlp6s0-0: SME: Trying to authenticate with 64:70:02:28:c1:bc (SSID=’DIRECT-VN’ freq=2412 MHz)
p2p-wlp6s0-0: Trying to associate with 64:70:02:28:c1:bc (SSID=’DIRECT-VN’ freq=2412 MHz)
p2p-wlp6s0-0: Associated with 64:70:02:28:c1:bc
p2p-wlp6s0-0: CTRL-EVENT-REGDOM-CHANGE init=CORE type=WORLD
p2p-wlp6s0-0: WPA: Key negotiation completed with 64:70:02:28:c1:bc [PTK=CCMP GTK=CCMP]
p2p-wlp6s0-0: CTRL-EVENT-CONNECTED – Connection to 64:70:02:28:c1:bc completed [id=0 id_str=]
P2P-GROUP-STARTED p2p-wlp6s0-0 client ssid=”DIRECT-VN” freq=2412 go_dev_addr=64:70:02:28:c1:bc
p2p-wlp6s0-0: CTRL-EVENT-DISCONNECTED bssid=64:70:02:28:c1:bc reason=4 locally_generated=1
p2p-wlp6s0-0: CTRL-EVENT-REGDOM-CHANGE init=CORE type=WORLD
CTRL-EVENT-SCAN-RESULTS
WPS-AP-AVAILABLE
Pls note that we need to use this pin (output after executing p2p_connect command in wpa_cli) to connect to our intended client.
Now we let’s move on to the client device with which we want to establish the connection. As said previously my BBB runs Arch linux with precompiled wpa supplicant. The reason behind choosing Arch linux to run BBB was because of Its simple interface and customizable features.
Few points to note:
- If you are using USB to power your target there are chances that the target may not be able to fully power the WIFI device. It is better to use power adaptor if the target is not capable of providing full power. This is true with BBB. Fortunately I had 5V/2A adaptor to use. Pls check your targets rated voltage and ampere rating before connecting directly with power adaptor.
- Try different WIFI adaptors (if you have few).
And also, I had a serial to USB adaptor which I used for connecting to the target. Since the Ethernet port was free and available, I used it to connect to my local network so that I can ssh into the device. Practically this gave me multiple terminal access to the device through the ethernet’s IP address.
[root@alarm ~]# ifconfig
eth0: flags=4163<UP,BROADCAST,RUNNING,MULTICAST> mtu 1500
inet6 fe80::caa0:30ff:feaf:7e3d prefixlen 64 scopeid 0x20
ether c8:a0:30:af:7e:3d txqueuelen 1000 (Ethernet)
RX packets 1 bytes 342 (342.0 B)
RX errors 0 dropped 0 overruns 0 frame 0
TX packets 27 bytes 4120 (4.0 KiB)
TX errors 0 dropped 0 overruns 0 carrier 0 collisions 0
device interrupt 175
lo: flags=73<UP,LOOPBACK,RUNNING> mtu 65536
inet 127.0.0.1 netmask 255.0.0.0
inet6 ::1 prefixlen 128 scopeid 0x10
loop txqueuelen 1 (Local Loopback)
RX packets 163 bytes 12937 (12.6 KiB)
RX errors 0 dropped 0 overruns 0 frame 0
TX packets 163 bytes 12937 (12.6 KiB)
TX errors 0 dropped 0 overruns 0 carrier 0 collisions 0
wlan0: flags=4099<UP,BROADCAST,MULTICAST> mtu 1500
ether 64:70:02:28:c1:bc txqueuelen 1000 (Ethernet)
RX packets 0 bytes 0 (0.0 B)
RX errors 0 dropped 0 overruns 0 frame 0
TX packets 0 bytes 0 (0.0 B)
TX errors 0 dropped 0 overruns 0 carrier 0 collisions 0
You can still follow the below procedure in a single terminal also. For the config file you can use the same file as it is in X86_64 machine (see above for example) except you need to change the device name so that it can be identified.
Now let us start the wpa_supplicant on BBB
[root@alarm ~]# wpa_supplicant -i wlan0 -c test.conf -Dnl80211 &
[1] 258
Successfully initialized wpa_supplicant
Now let’s fire up the wpa_cli
[root@alarm ~]# wpa_cli -i wlan0
wpa_cli v2.5
Copyright (c) 2004-2015, Jouni Malinen <j@w1.fi> and contributors
This software may be distributed under the terms of the BSD license.
See README for more details.
Interactive mode
> p2p_find 4
OK
CTRL-EVENT-SCAN-STARTED
CTRL-EVENT-SCAN-STARTED
CTRL-EVENT-SCAN-STARTED
CTRL-EVENT-SCAN-STARTED
CTRL-EVENT-SCAN-STARTED
CTRL-EVENT-SCAN-STARTED
> P2P-FIND-STOPPED
P2P-FIND-STOPPED
> p2p_find 4
OK
CTRL-EVENT-SCAN-STARTED
CTRL-EVENT-SCAN-STARTED
CTRL-EVENT-SCAN-STARTED
> P2P-DEVICE-FOUND 78:0c:b8:50:d1:e8 p2p_dev_addr=78:0c:b8:50:d1:e8 pri_dev_type=2-0050F204-1 name=’mint’ config_methods=0x1108 dev_capab=0x25 group_capab=0x0 new=1
P2P-DEVICE-FOUND 78:0c:b8:50:d1:e8 p2p_dev_addr=78:0c:b8:50:d1:e8 pri_dev_type=2-0050F204-1 name=’mint’ config_methods=0x1108 dev_capab=0x25 group_capab=0x0 new=1
CTRL-EVENT-SCAN-STARTED
CTRL-EVENT-SCAN-STARTED
> P2P-FIND-STOPPED
P2P-FIND-STOPPED
CTRL-EVENT-SCAN-STARTED
>
> p2p_peers
78:0c:b8:50:d1:e8
> p2p_connect 78:0c:b8:50:d1:e8 62349055
OK
> P2P-GO-NEG-SUCCESS role=GO freq=2412 ht40=0 peer_dev=78:0c:b8:50:d1:e8 peer_iface=78:0c:b8:50:d1:e9 wps_method=Keypad
P2P-GO-NEG-SUCCESS role=GO freq=2412 ht40=0 peer_dev=78:0c:b8:50:d1:e8 peer_iface=78:0c:b8:50:d1:e9 wps_method=Keypad
> [ 352.940447] IPv6: ADDRCONF(NETDEV_UP): wlan0: link is not ready
Using interface wlan0 with hwaddr 64:70:02:28:c1:bc and ssid “DIRECT-VN”
[ 353.102460] IPv6: ADDRCONF(NETDEV_CHANGE): wlan0: link becomes ready
wlan0: interface state UNINITIALIZED->ENABLED
wlan0: AP-ENABLED
AP-ENABLED
> wlan0: CTRL-EVENT-CONNECTED – Connection to 64:70:02:28:c1:bc completed [id=0 id_str=]
CTRL-EVENT-CONNECTED – Connection to 64:70:02:28:c1:bc completed [id=0 id_str=]
WPS-ENROLLEE-SEEN 78:0c:b8:50:d1:e9 9f678d4d-5d02-5c3e-8d7d-e004d2551f77 0-00000000-0 0x3148 0 1 [ ]
> wlan0: CTRL-EVENT-EAP-STARTED 78:0c:b8:50:d1:e9
CTRL-EVENT-EAP-STARTED 78:0c:b8:50:d1:e9
> wlan0: CTRL-EVENT-EAP-PROPOSED-METHOD vendor=0 method=1
CTRL-EVENT-EAP-PROPOSED-METHOD vendor=0 method=1
> wlan0: CTRL-EVENT-EAP-PROPOSED-METHOD vendor=14122 method=254
CTRL-EVENT-EAP-PROPOSED-METHOD vendor=14122 method=254
> wlan0: WPS-REG-SUCCESS 78:0c:b8:50:d1:e9 9f678d4d-5d02-5c3e-8d7d-e004d2551f77
WPS-REG-SUCCESS 78:0c:b8:50:d1:e9 9f678d4d-5d02-5c3e-8d7d-e004d2551f77
> P2P-GROUP-FORMATION-SUCCESS
P2P-GROUP-FORMATION-SUCCESS
P2P-GROUP-STARTED wlan0 GO ssid=”DIRECT-VN” freq=2412 passphrase=”souD5N1B” go_dev_addr=64:70:02:28:c1:bc
> P2P-GROUP-STARTED wlan0 GO ssid=”DIRECT-VN” freq=2412 go_dev_addr=64:70:02:28:c1:bc
wlan0: WPS-SUCCESS
WPS-SUCCESS
> wlan0: CTRL-EVENT-EAP-FAILURE 78:0c:b8:50:d1:e9
CTRL-EVENT-EAP-FAILURE 78:0c:b8:50:d1:e9
> wlan0: AP-STA-CONNECTED 78:0c:b8:50:d1:e9 p2p_dev_addr=78:0c:b8:50:d1:e8
AP-STA-CONNECTED 78:0c:b8:50:d1:e9 p2p_dev_addr=78:0c:b8:50:d1:e8
Above is the sample log of the scanning and connection establishment between the two devices.
Let us split up the execution process
- First execute p2p_find in both the devices for 10 seconds. This should help us to see the devices that is available.
- Then run p2p_peers command on both the devices. It should show the identified peer mac addresses. That is on X86_64 machine it should show BBB’s WIFI card’s MAC address and on the BBB it should show the WIFI MAC address of the X86_64 machine.
- Now we need to run p2p_connect with peers MAC address, intent value and authentication method on the X86_64 machine which will give us the key.
- On the BBB target we should run p2p_connnect with peer mac address and output pin derived from previous step in X86_64 machine.
Now if the pin is correct then connection will be established. The above attached logs are taken from a working setup. The steps are really simple and the connection established is pretty much stable.
Hope this blog helps you to connect two linux machines directly through WiFi.
