
Object Detection & Classification using Yolo v8 in WSL

To show a live webcam and detect the object in the camera from WSL is a challenging task, here is how I solve the problem.
Follow these is the steps:
Step 1: Install USBIPD-WIN
Install usbipd service on Windows, download the installer (.msi) from this url Releases · dorssel/usbipd-win (github.com) download the latest version.
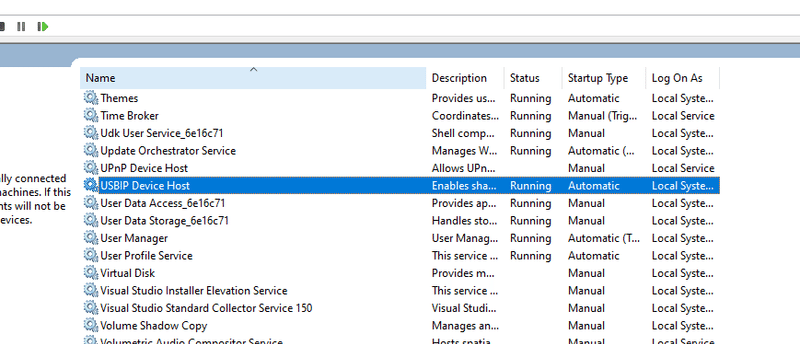
After finish installation, if you check on the service panel, you will have a new service 'USBIP Device Host'
Step 2: Bind the usb / integrated web camera, with PowerShell cli (you must use administrator privelege)
First, list all the usb devices in the system.
c:\>usbipd list

Connected:
BUSID  VID:PID    DEVICE                                                        STATE
2-3    1bcf:08a0  USB Input Device                                              Not shared
2-5    0c45:673b  Integrated Webcam, Integrated IR Webcam                       Shared
2-7    187c:0550  USB Input Device                                              Not shared
2-8    0d62:3740  WinUsb Device, USB Input Device                               Not shared
2-10   8087:0033  Intel(R) Wireless Bluetooth(R)                                Not shared

Persisted:
GUID                                  DEVICE
From above step, we know that the web camera is on the bus id 2-5. Then we will bind / share the bus id, type this command.
c:\>usbipd bind -b 2-5
usbipd: info: Device with busid '2-5' was already shared.
Open WSL window, from another terminal, so at this time you will have 2 windows, one is the PowerShell window, and the other is the WSL window.
c:\>wslfrom the PowerShell window, type this command.
c:\>usbipd attach -b 2-5 -w
usbipd: info: Using WSL distribution 'Ubuntu-22.04' to attach; the device will be available in all WSL 2 distributions.
usbipd: info: Using IP address 172.21.64.1 to reach the host.
and after that move to WSL window, and type this command, you will see your web camera is already detected, but we still cannot use it since, the default Linux kernel doesn't support web camera driver yet.
$ lsusb
Bus 002 Device 001: ID 1d6b:0003 Linux Foundation 3.0 root hub
Bus 001 Device 003: ID 0c45:673b Microdia Integrated_Webcam_HD
Bus 001 Device 001: ID 1d6b:0002 Linux Foundation 2.0 root hub
Step 3: Add web camera driver to the WSL Linux kernel.
from WSL window, type this command, and you will know the kernel version installed on your WSL.
$ uname -r
5.15.133.1-microsoft-standard-WSL2+
Let's prepare the dependency packages to compile the kernel, type these commands in the WSL window.
# declare and set variable
VERSION=5.15.133.1  #in my case, my kernel version is 5.15.133.1

$ sudo apt update && sudo apt upgrade -y && sudo apt install -y build-essential flex bison libgtk2.0-dev libelf-dev libncurses-dev autoconf libudev-dev libtool zip unzip v4l-utils libssl-dev python3-pip cmake git iputils-ping net-tools dwarves bc
since WSL kernel is open source, you can download / clone the kernel source from Microsoft github repository, type these commands on WSL window.
$ sudo mkdir /usr/src
$ cd /usr/src
$ sudo git clone -b linux-msft-wsl-${VERSION} https://github.com/microsoft/WSL2-Linux-Kernel.git ${VERSION}-microsoft-standard && cd ${VERSION}-microsoft-standard

# inside the source folder, run this command
$ sudo cp /proc/config.gz config.gz
$ sudo gunzip config.gz
$ sudo mv config .config
$ sudo make menuconfig
after that, the config window will appear. and enable the modules with embedded kernel driver, at the left side of the item will show (*)
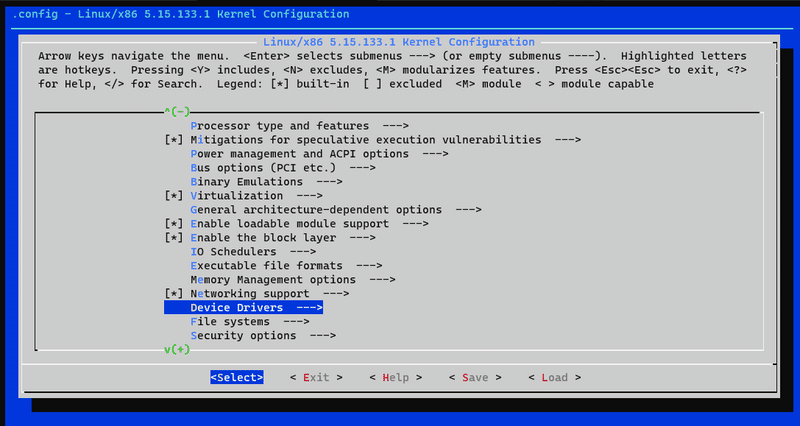
# menuconfig -> Device Drivers -> Multimedia support -> Filter media drivers
# -> Device Drivers -> Multimedia support -> Media device types -> Cameras and video grabbers
# -> Device Drivers -> Multimedia support -> Video4Linux options -> V4L2 sub-device userspace API
# -> Device Drivers -> Multimedia support -> Media drivers -> Media USB Adapters -> USB Video Class (UVC)
# -> Device Drivers -> Multimedia support -> Media drivers -> Media USB Adapters -> UVC input events device support
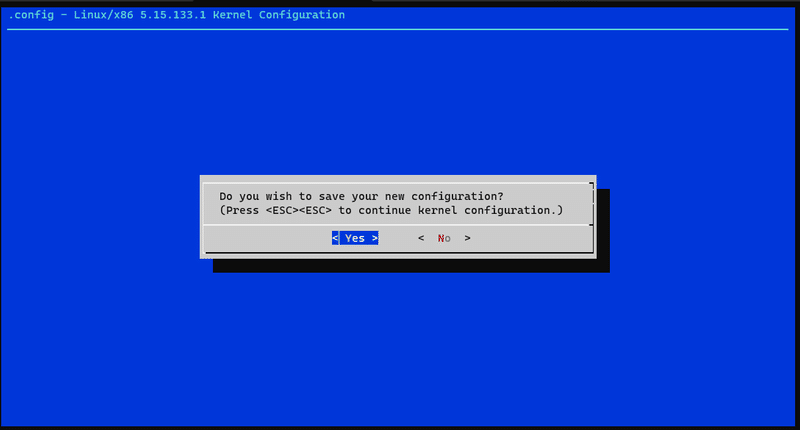
# -> Device Drivers -> Multimedia support -> Media drivers -> Media USB Adapters -> GSPCA based webcamsafter that, you choose Exit, and choose save on Exit.
After that, we build the kernel, based on the new configurations.
$ sudo make -j$(nproc)
$ sudo make modules_install -j$(nproc)
$ sudo make install -j$(nproc)

# copy the new kernel into the folder you like
$ sudo cp -rf vmlinux /mnt/c/sources/
Step 4: Change the WSL config, every time you start WSL, it will use the new kernel.
Make a new file .wslconfig on your home folder on Windows c:\Users\<yourusername>\.wslconfig, and type below configuration inside the file
[wsl2]
kernel=<yournewkernelfoler>\\vmlinux
Step 5: Shutdown the WSL and re-open the WSL. Setting up kernel driver DONE.
To test your web camera on WSL, you can use guvcview, it will pop-up a new window showing your web camera.
# install guvcview application
$ sudo apt install v4l-utils guvcview
# start guvcview application
$ guvcview
If you want to install CUDA on WSL you can follow from NVIDIA website.
If you want to install CUDA on WSL, follow these steps on nvidia website
Step 6: Install Anaconda, on WSL
If you don't know how to install Anaconda, you can read my other article here to Install Anaconda on Windows (WSL)
Step 7: Create new Conda Environment
(base) $ sudo conda create -n yolo python=3.8 -y

(base) $ sudo conda activate yolo

(yolo) $ sudo conda install -c pytorch -c nvidia -c conda-forge pytorch torchvision pytorch-cuda=11.8 ultralytics
Step 8: Create new python code (yolotest.py), with your favorite IDE, if you don't know how to install IDE, you can follow on my article here
from ultralytics import YOLO
import cv2
import math
W=640
H=480
# start webcam
cap = cv2.VideoCapture(0)
cap.set(cv2.CAP_PROP_FOURCC, cv2.VideoWriter_fourcc('M','J','P','G'))
cap.set(cv2.CAP_PROP_FRAME_WIDTH, W)
cap.set(cv2.CAP_PROP_FRAME_HEIGHT, H)
cap.set(cv2.CAP_PROP_FPS, 30)
# model
model = YOLO("yolov8n.pt")
# object classes
classNames = ["person", "bicycle", "car", "motorbike", "aeroplane", "bus", "train", "truck", "boat",
"traffic light", "fire hydrant", "stop sign", "parking meter", "bench", "bird", "cat",
"dog", "horse", "sheep", "cow", "elephant", "bear", "zebra", "giraffe", "backpack", "umbrella",
"handbag", "tie", "suitcase", "frisbee", "skis", "snowboard", "sports ball", "kite", "baseball bat",
"baseball glove", "skateboard", "surfboard", "tennis racket", "bottle", "wine glass", "cup",
"fork", "knife", "spoon", "bowl", "banana", "apple", "sandwich", "orange", "broccoli",
"carrot", "hot dog", "pizza", "donut", "cake", "chair", "sofa", "pottedplant", "bed",
"diningtable", "toilet", "tvmonitor", "laptop", "mouse", "remote", "keyboard", "cell phone",
"microwave", "oven", "toaster", "sink", "refrigerator", "book", "clock", "vase", "scissors",
"teddy bear", "hair drier", "toothbrush"
]
while True:
success, img = cap.read()
results = model(img, stream=True)
# coordinates
for r in results:
boxes = r.boxes
for box in boxes:
# bounding box
x1, y1, x2, y2 = box.xyxy[0]
x1, y1, x2, y2 = int(x1), int(y1), int(x2), int(y2) # convert to int values
# put box in cam
cv2.rectangle(img, (x1, y1), (x2, y2), (255, 0, 255), 3)
# confidence
confidence = math.ceil((box.conf[0]*100))/100
print("Confidence --->",confidence)
# class name
cls = int(box.cls[0])
print("Class name -->", classNames[cls])
# object details
org = [x1, y1]
font = cv2.FONT_HERSHEY_SIMPLEX
fontScale = 1
color = (255, 0, 0)
thickness = 2
cv2.putText(img, classNames[cls], org, font, fontScale, color, thickness)
cv2.imshow('Webcam', img)
if cv2.waitKey(1) == ord('q'):
break
cap.release()
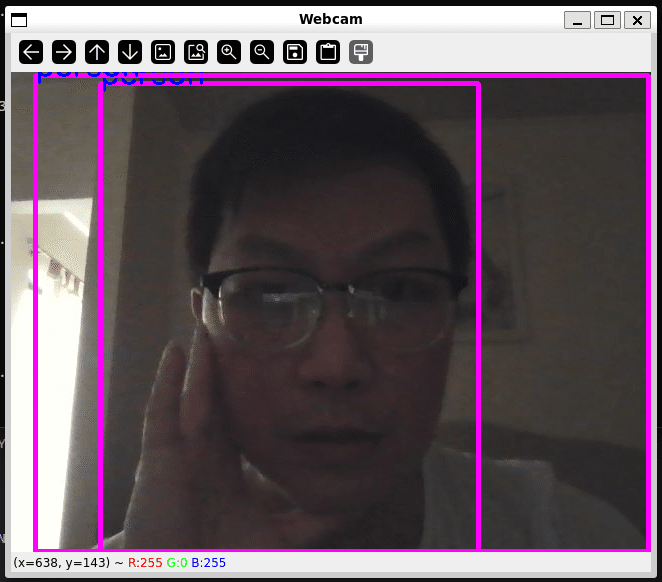
cv2.destroyAllWindows()Step 9: Run the application
(yolo) $ python yolotest.pyHere is the result
この記事が気に入ったらサポートをしてみませんか?